Creating My Taylor Swift Embroidered Jacket in 2 Weeks
I’ve previously shared a few posts about creating my embroidered Taylor Swift jacket; however, I thought it would be fun to share a few behind-the-scenes pictures of the two-week journey to get to the finished jacket!
DISCLOSURE: This post contains affiliate links, meaning I'll receive a commission if you purchase through my link, but at no extra cost to you. As an Amazon Associate, I earn from qualifying purchases. Please read the full disclaimer for more information. Thanks!
This process was time-consuming but I would do it over and over again in a heartbeat. Let’s get into it!
Tackling an Embroidered Jacket
Everything started when I came across a social media video, as it goes in today’s world. I was scrolling through Instagram when I got @vhandstitching’s reel on her Taylor Swift embroidered jean jacket.
I immediately decided I needed to make my version ASAP.
I did not want an embroidered jean jacket because I already owned a jean jacket that I liked and did not want to change it. After a visit to my local Goodwill, I narrowed down my vision. During the Goodwill shopping trip, I found a white jacket (still jean material, though) that fit me on the baggier side.
I figured it was the perfect canvas for this Taylor Swift embroidered album jacket and bought it. I also ended up finding some “Midnights” themed pants since they were the perfect cobalt blue. Check out the Goodwill haul in my YouTube video below!
Album Title Templates
After finding the perfect jacket, I needed to figure out how to add the album titles in their fonts to the jacket. I made my way to the internet, looked up a variety of album titles, and saved the versions of the album titles I liked the most. I then combined all those images into a Microsoft Word document and printed it on water-soluble paper.
Let’s keep in touch…
Get your hands on the album title template for your Taylor Swift embroidered jacket project!
I then spent approximately a week doing absolutely nothing.
Then, one day, it dawned on me that I had just a few more days before I was two weeks away from the Taylor Swift concert. That realization shifted my butt into gear and I immediately started cutting out my water-soluble album titles. I then played around with a few different configurations of the album titles until I decided on one that I liked and flowed well on the jacket.

Embroidering Album Titles
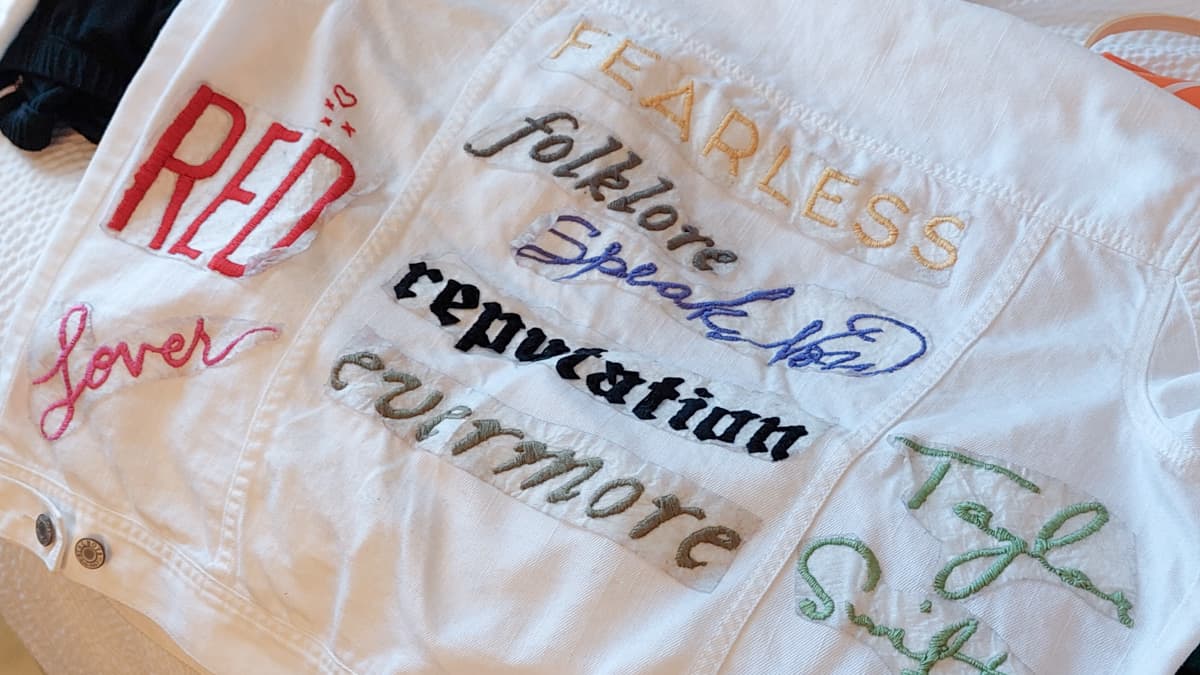
The first album title I embroidered was “Lover”! I decided that the cursive would probably be the hardest font to do so I wanted to make sure I got it embroidered first. Then I tackled Red and Speak Now. Lover and Speak Now were probably the harder fonts because they were in cursive and I had to think through my stitches whenever letters overlapped.
Red was much easier to embroider because it had lots of straight stitches and was easy to plan out since it had no overlapping letters or curves.
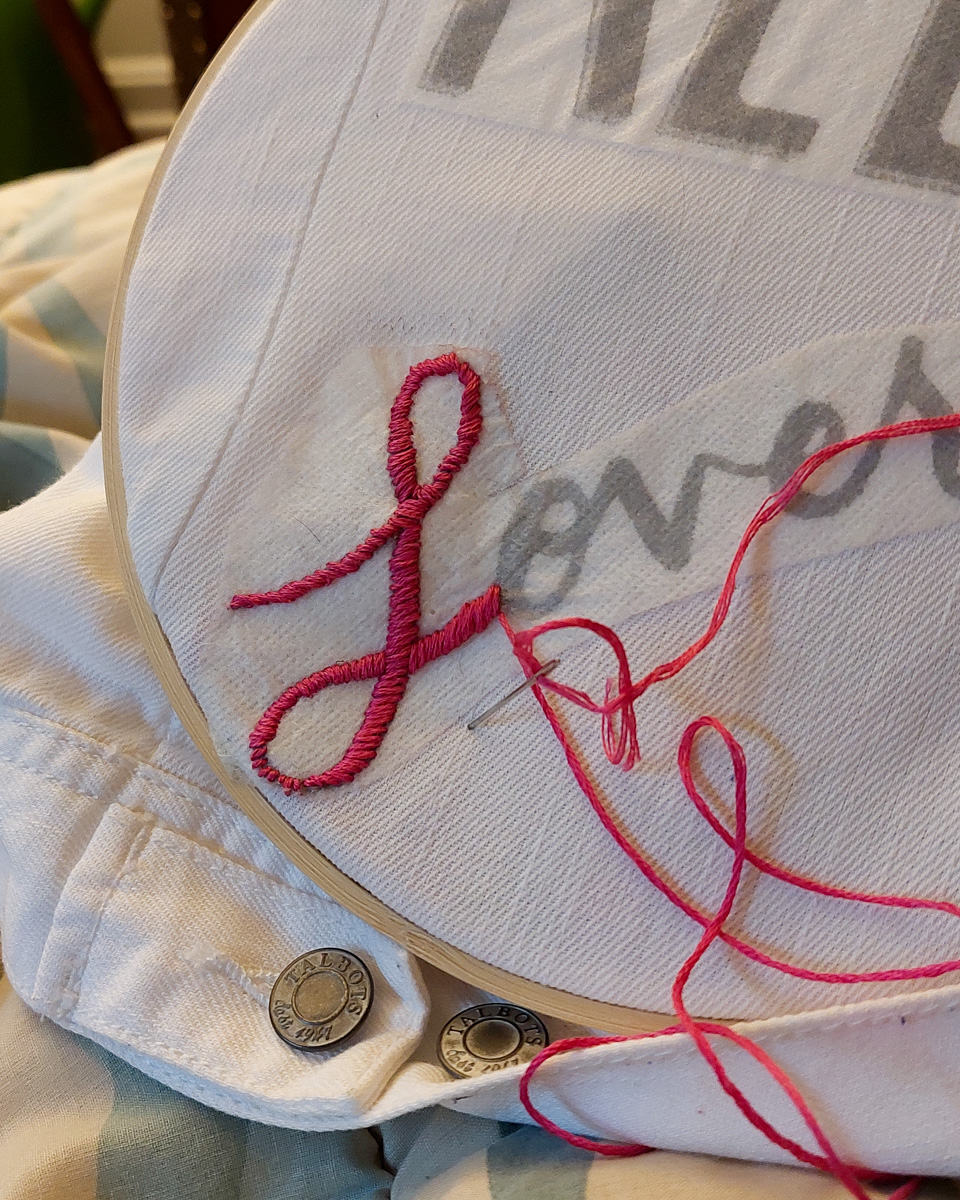

As I said earlier, I was in work mode and was constantly sewing throughout my free time. My husband caught this picture of me embroidering while watching a YouTube video. I started using my hiking headlamp because the bright light made it easier to embroider and my stitches were coming out more even and neat, even if I did look absolutely ridiculous.

In the middle of this embroidery sprint, I attended Record Store Day! Not only did I win the Folklore: The Long Pond Studio Sessions vinyl battle, but I also made quite a bit of progress on Fearless. I forgot to bring my scissors to the early morning excursion – I woke up around 5 AM, so makes sense – and the store didn’t even open until 9 AM.
So, I was there for several hours working on my Taylor Swift embroidered jacket (with a headlamp, , and blanket) while waiting in line for Taylor Swift’s Folklore: Long Pond Studio Sessions vinyl (very meta) until I ran out of thread, which was just about an hour or so before the store opened. Since I was within the first twenty or so people, I easily got my hands on the Taylor Swift Folklore vinyl! I then immediately went home, popped it open, and kept embroidering the rest of Fearless.
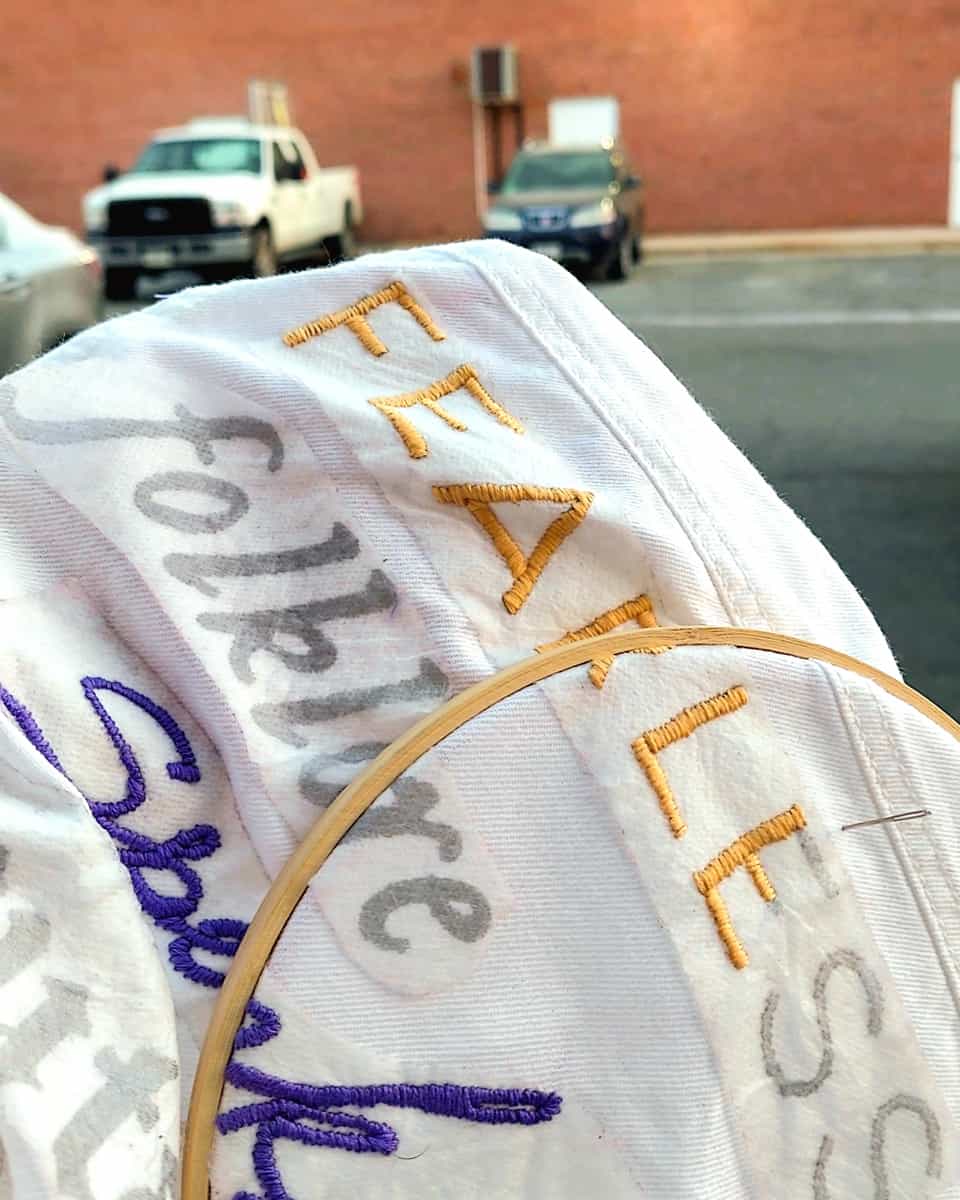

I kept embroidering the album titles as often as possible. I was even taking my jacket with me to work, especially during my evening shifts, when things were quieter, to work on the jacket as often as possible. I was usually able to finish a few letters at a time. Taylor Swift (debut) was another cursive font that was a lot easier to do after working on Lover and Speak Now.
At this point, I was PANICKING. According to my T. Swift Jacket Instagram Highlights, I finished Taylor Swift (debut) on April 27, which was only a few days before the concert and just TWO days before my flight to Atlanta. I already had 1989 done and barely finished folklore.

Heading to the Airport
I headed to the airport with most but not all of the Taylor Swift embroidered jacket done! In fact, I had about one more title to finish up: evermore.
A few days before my travel date, I double-checked TSA rules and learned I was allowed to bring in an embroidery scissor, as long as it was less than four inches long. I immediately headed to Jo-Ann and got a pack of small scissors, making sure there was at least one that was the correct size. I then kept my sewing bag with threads, needles, and scissors accessible in the front section of my luggage.
As soon as I found my gate, I found a seat and immediately started attacking this jacket. I also kept embroidering during the flight. I probably scared the poor person next to me when I pulled out my mini scissors and thread. I landed in Atlanta with about half of the album done.

Attending the Concert
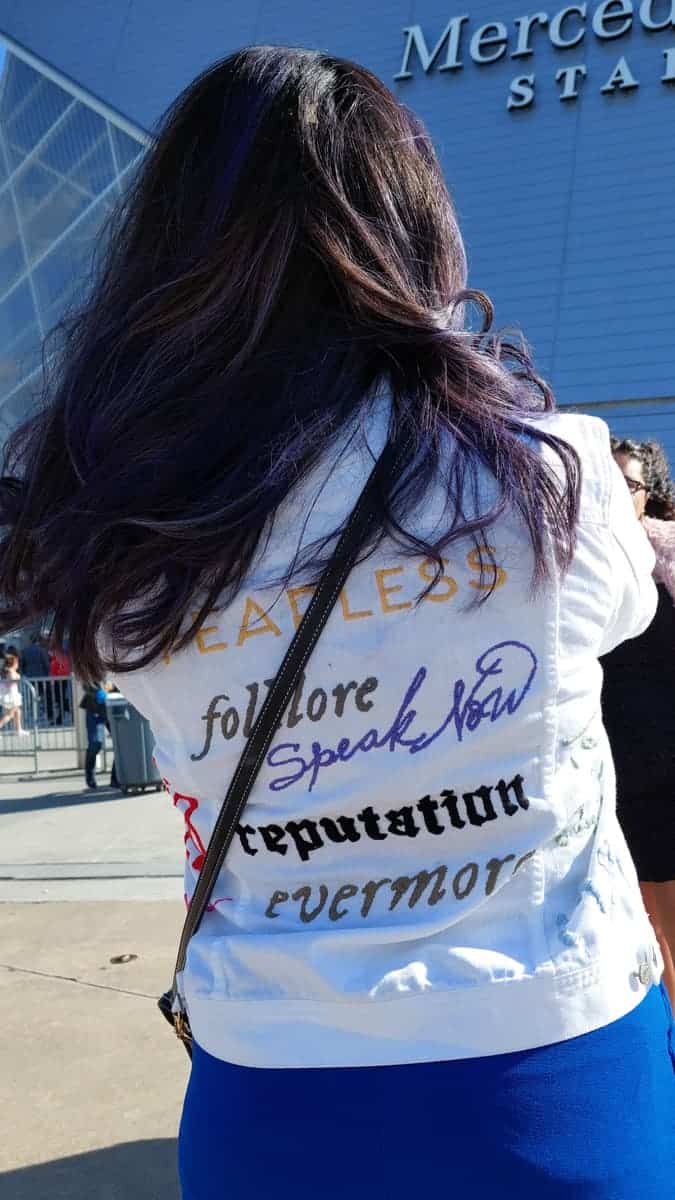
The day of the concert was a full chaotic mess. Since the concert was not until 6 PM (or doors opening anyway), my group decided to take the day slow and wake up late, eat brunch, and get ready. During that time, I was still finishing up evermore.
While we ate brunch and chatted, I embroidered my Taylor Swift jacket as quickly as possible. I finished the Taylor Swift embroidered jacket in the middle of our brunch session but I still needed to rinse the backing from the jacket. This process took much longer than I expected. It was about a solid 15 minutes of washing away the worst of the water-soluble backing in the shower, then throwing the jacket in the laundry machine and dryer (I had double-checked that our hotel had these available).

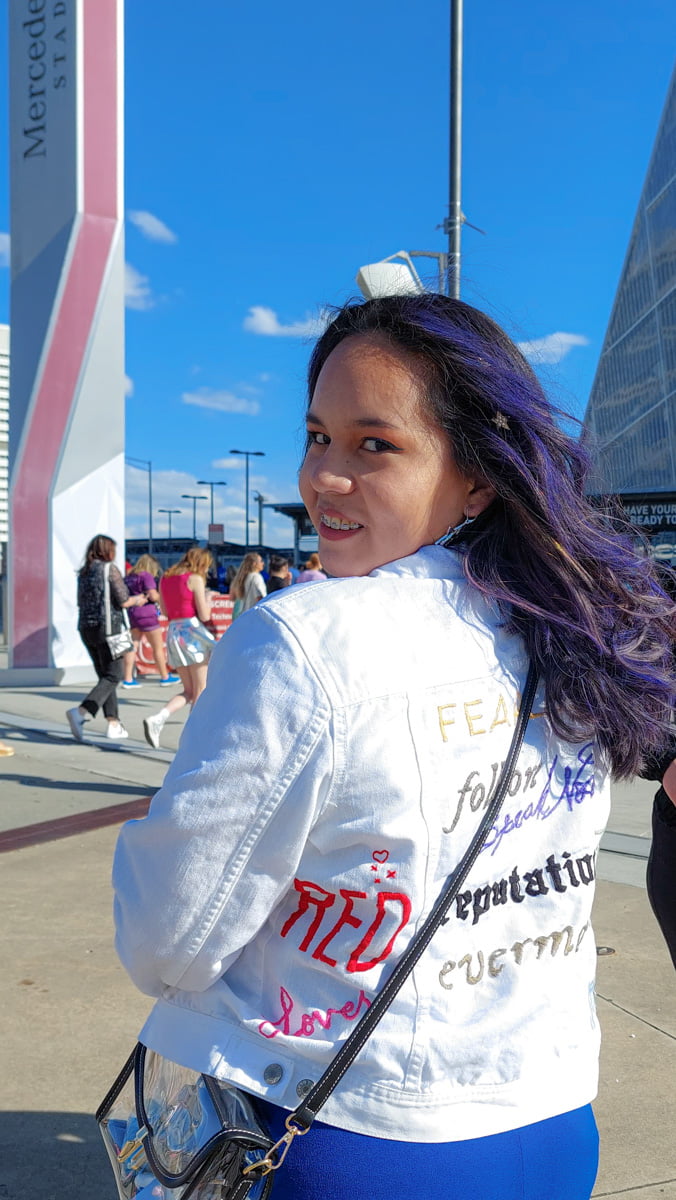
In the end, I made it to the concert with most of my Taylor Swift embroidered jacket done (I’m still missing Midnights)! I was worried about the thread dye leaking out into the white jacket but that never happened!


Wrapping It Up: Was the Taylor Swift Embroidered Jacket Worth It?
100%. I would immediately do it over and over again.
Creating this Taylor Swift embroidered jacket was a fulfilling creative journey that tested a lot of my skills. I learned how to embroider out of necessity, expanded my skill set, and realized how terrible I am with planning things out, but also how well I can stick to a project when I commit to it.
We went from an idea and a blank white jacket to a fully executed embroidered jacket within about a whole month (with a week of break time in between). I’ve now worn this jacket multiple times, including to The Eras Tour movie!
If you’re interested in creating your own Taylor Swift embroidered jacket, I go over all the steps I took to create mine, as well as share some tips and pitfalls to watch out for.
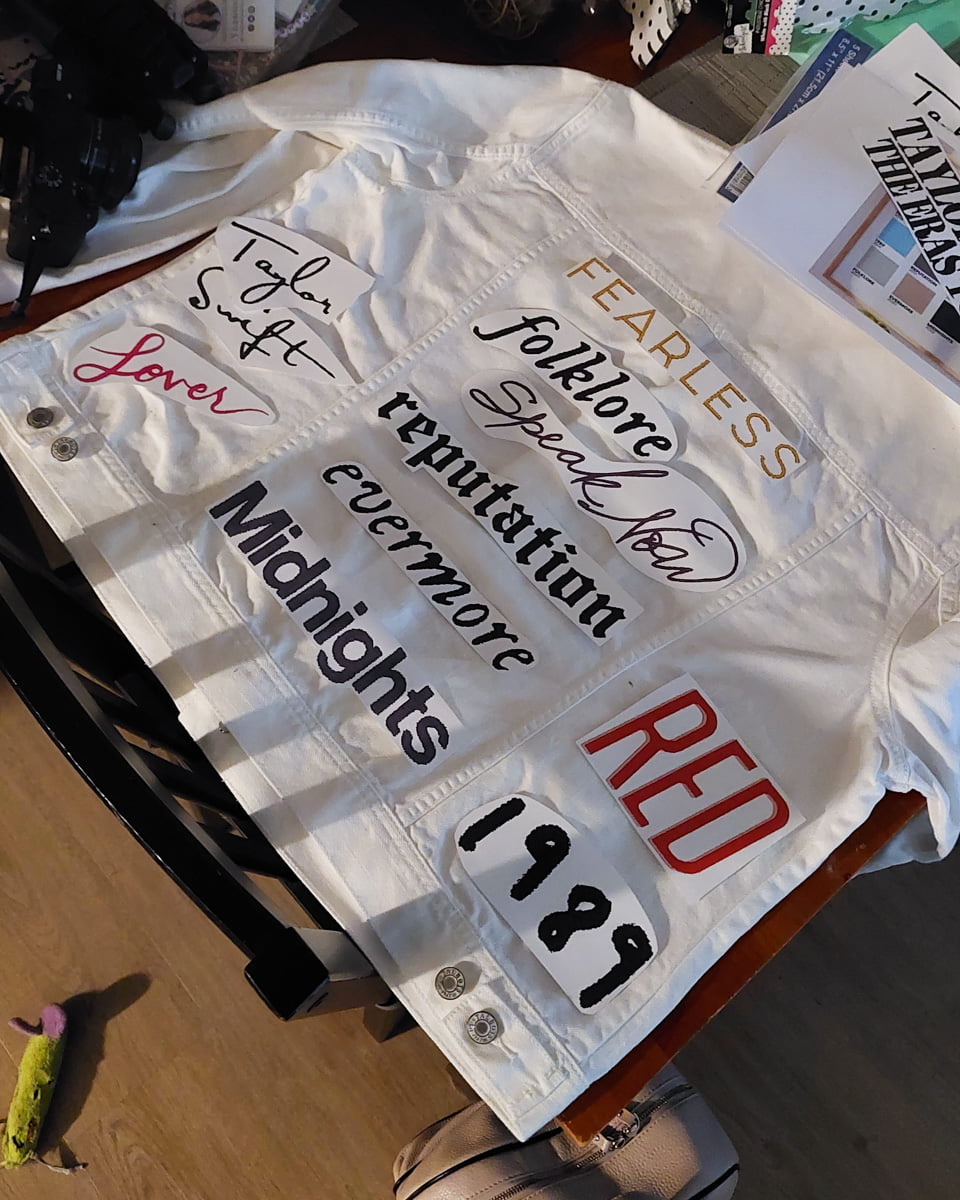

Creating this Taylor Swift embroidered jacket was a creative journey that forced me out of my comfort zone. I’m so glad that I took it upon myself to create my version of the Taylor Swift embroidered jacket and I cannot wait to keep wearing it over and over again (and maybe one day finally add Midnights).
This is a diary post about
Creating My Taylor Swift Embroidered Jacket in Two Weeks.
